

Bringing Elegance to the Night: Implementing Dark Mode in Your Rails 7 App with Tailwind and Stimulus JS


In the ever-evolving landscape of web development, user experience remains a top priority. One key element of enhancing the user experience is the implementation of dark mode, a feature that has gained immense popularity in recent years. Dark mode not only reduces eye strain but also adds a touch of elegance to your web application, providing users with a choice that suits their preferences.
In this comprehensive guide, we'll embark on a journey to integrate dark mode seamlessly into your Rails 7 application, leveraging the power of Tailwind CSS and Stimulus JS. Whether you're a seasoned developer or just starting on your coding adventure, this step-by-step tutorial will walk you through the process, from creating a new Rails app to addressing those pesky screen flashes that can sometimes accompany dark mode transitions.
By the end of this tutorial, you'll not only have a functional dark mode feature in your Rails 7 app but also a deeper understanding of how to integrate Stimulus and JavaScript to enhance your web applications. So, let's get started on our quest to create a more elegant and user-friendly web experience with dark mode.
Creating The Rails App
Our journey to implement dark mode in a Rails 7 application with Tailwind CSS and Stimulus JS begins with the creation of a new Rails project. Ensure you have Rails 7 installed, and then run the following command to kickstart your project:
rails new dark-mode --css=tailwind
This command not only generates a new Rails 7 application but also configures it to work seamlessly with Tailwind CSS, setting the stage for our dark mode implementation.
Configuring Tailwind
To prepare our Rails 7 application for the enchantment of dark mode, we first need to configure Tailwind CSS to embrace this feature. Open the config/tailwind.config.js file in your project, and add the following:
module.exports = {
     require('@tailwindcss/aspect-ratio'),
     require('@tailwindcss/typography'),
     require('@tailwindcss/container-queries'),
-  ]
+  ],
+  darkMode: 'class',
 }
Home Page And Markup
With our Rails application set up and Tailwind CSS configured for dark mode, it's time to create the home page and add the essential markup. We begin by generating a controller for the home page and defining the route. Run the following command:
rails g controller home index
In the config/routes.rb file, make sure it includes the following:
Rails.application.routes.draw do
  get 'home/index'

  root 'home#index'
end
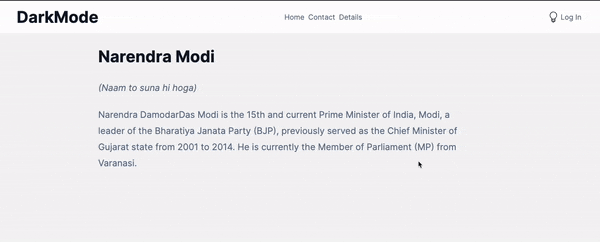
Now, let's craft the HTML markup for the home page. In the app/views/home/index.html.erb file, insert the following code:
<article class="prose lg:prose-xl text-slate-500 dark:text-slate-400">
  <h2 class="text-slate-900 dark:text-white">Narendra Modi</h2>
  <i>(Naam to suna hi hoga) </i>
  <p>
   Narendra DamodarDas Modi is the 15th and current Prime Minister of India,
   Modi, a leader of the Bharatiya Janata Party (BJP), previously served as the Chief Minister
   of Gujarat state from 2001 to 2014. He is currently the Member of Parliament (MP) from Varanasi.
  </p>
</article>
This markup showcases a sample article with a dark mode-friendly design. But we're not stopping here. In the app/views/layouts/application.html.erb file, we've made some adjustments to the <body> element to enable dark mode:
-  <body>
+  <body class="bg-neutral-100 dark:bg-neutral-900">
-    <main class="container mx-auto mt-28 px-5 flex">
+    <header class="bg-white dark:bg-slate-800 text-slate-500 dark:text-slate-400 p-4 flex items-center justify-around">
+      <h1 class="text-slate-900 dark:text-white font-bold text-4xl">DarkMode</h1>
+
+      <nav class="space-x-1">
+        <a href="#">Home</a>
+        <a href="#">Contact</a>
+        <a href="#">Details</a>
+      </nav>
+
+      <div class="flex space-x-1">
+        <div>
+          <%= image_tag("icons/light-bulb.svg", class: 'w-6 h-6 hover:cursor-pointer') %>
+        </div>
+        <a href="#">Log In</a>
+      </div>
+    </header>
+    <main class="container mx-auto py-8 max-w-4xl">
       <%= yield %>
     </main>
   </body>
We've also enhanced the header section to make it ready for dark mode toggling. The header now includes a light bulb icon for switching modes:

Stimulus Js
With our markup ready, it's time to introduce the magic of Stimulus JS for smooth dark mode toggling. Let's start by generating a Stimulus controller specifically for dark mode:
rails g stimulus dark_mode
This command creates a dark_mode_controller.js file in your app/javascript/controllers directory. In this controller, we've crafted JavaScript code that checks and toggles dark mode. Below is the content of app/javascript/controllers/dark_mode_controller.js:
import { Controller } from "@hotwired/stimulus"

export default class extends Controller {
    initialize() {
        if (localStorage.theme === 'dark' || (!('theme' in localStorage) && window.matchMedia('(prefers-color-scheme: dark)').matches)) {
            document.documentElement.classList.add('dark')
        } else {
            document.documentElement.classList.remove('dark')
        }
    }

    toggle() {
        if (localStorage.theme === 'dark') {
            localStorage.theme = 'light'
        } else {
            localStorage.theme = 'dark'
        }
        this.initialize()
    }
}
This Stimulus controller is responsible for two key functions: initialization and toggling. During initialization, it checks the user's preference for dark mode and sets the dark class on the HTML element accordingly. The toggle function, on the other hand, flips the dark mode setting in local storage and calls the initialize function to apply the changes immediately.
In your app/views/layouts/application.html.erb file, we've modified the light bulb icon element to incorporate this Stimulus controller:
--- app/views/layouts/application.html.erb
       </nav>

       <div class="flex space-x-1">
-        <div>
-          <%= image_tag("icons/light-bulb.svg", class: 'w-6 h-6 hover:cursor-pointer') %>
+        <div data-controller="dark-mode">
+          <%= image_tag("icons/light-bulb.svg", class: 'w-6 h-6 hover:cursor-pointer', data: { action: 'click->dark-mode#toggle'}) %>
         </div>
         <a href="#">Log In</a>
       </div>
Now, clicking on the light bulb icon will trigger the dark mode toggle seamlessly, creating a dynamic and engaging user experience.
Fixing Screen Flash
While our dark mode implementation is coming together smoothly, you may have noticed a slight screen flash when users refresh the page. We want to eliminate this visual hiccup to ensure a seamless experience. To achieve this, we've made a couple of adjustments.

First, in your app/views/layouts/application.html.erb file, we've added a script block to check for the user's dark mode preference during page load and apply the appropriate dark class to the HTML element without waiting for Stimulus to initialize. This eliminates the initial flash of the default theme:
     <%= stylesheet_link_tag "application", "data-turbo-track": "reload" %>
     <%= javascript_importmap_tags %>
+
+    <script>
+      if (localStorage.theme === 'dark' || (!('theme' in localStorage) && window.matchMedia('(prefers-color-scheme: dark)').matches)) {
+        document.documentElement.classList.add('dark')
+      }
+    </script>
   </head>
Next, we've updated the app/javascript/controllers/dark_mode_controller.js file. Instead of calling initialize directly, we've introduced a dedicated method called toggleDarkModeClass. This method handles the logic of adding the dark class to the HTML element when dark mode is enabled:
 import { Controller } from "@hotwired/stimulus"

 export default class extends Controller {
-    initialize() {
+    toggleDarkModeClass() {
         if (localStorage.theme === 'dark' || (!('theme' in localStorage) && window.matchMedia('(prefers-color-scheme: dark)').matches)) {
             document.documentElement.classList.add('dark')
         } else {

             localStorage.theme = 'dark'
         }

-        this.initialize()
+        this.toggleDarkModeClass()
     }
 }
With these adjustments in place, the screen flash on refresh is effectively addressed, offering a smoother and more polished dark mode experience to your users.
Refactoring To A Partial
As we strive for cleaner and more maintainable code, it's time to refactor our dark mode check code into a partial. In your app/views/layouts/application.html.erb file, we've made a significant change by replacing the script block responsible for checking and toggling dark mode with a partial rendering statement:
     <%= stylesheet_link_tag "application", "data-turbo-track": "reload" %>
     <%= javascript_importmap_tags %>

-    <script>
-      if (localStorage.theme === 'dark' || (!('theme' in localStorage) && window.matchMedia('(prefers-color-scheme: dark)').matches)) {
-        document.documentElement.classList.add('dark')
-      }
-    </script>
+    <%= render "layouts/dark_mode_check" %>
   </head>

   <body class="bg-neutral-100 dark:bg-neutral-900">
This change helps keep our layout file concise and organized. The dark mode check logic now resides in the _dark_mode_check.html.erb partial, which is included in the application layout. Below is the content of the _dark_mode_check.html.erb partial:
<%# app/views/layouts/_dark_mode_check.html.erb #%>
<script>
  if (localStorage.theme === 'dark' || (!('theme' in localStorage) && window.matchMedia('(prefers-color-scheme: dark)').matches)) {
    document.documentElement.classList.add('dark')
  }
</script>
By refactoring the dark mode check into a partial, we promote code reusability and maintainability. Should you need to make adjustments or enhancements to the dark mode logic in the future, you can do so in one central location, ensuring consistency across your application.
As we conclude our journey into the world of dark mode implementation in Rails 7 using Tailwind CSS, Stimulus and JavaSript, I encourage you to explore further and adapt what you've learned to your projects. To dive deeper into the code and see the full implementation, you can check out the GitHub repository associated with this article. For comprehensive documentation on Tailwind CSS and its dark mode feature, visit the Tailwind CSS documentation.
I hope this tutorial has not only equipped you with the technical know-how to create a more user-friendly and elegant web application but also sparked your creativity to explore new ways to enhance the user experience. With the power of dark mode at your fingertips, your Rails applications are poised to shine even brighter in the digital realm.
Thank you for joining me on this journey, and I look forward to seeing your web applications flourish with the magic of dark mode. Happy coding!